How to Build a Roof Truss: A Step-by-Step Guide
How to build a roof truss step by step: setting the jig, cutting chords, gusseting joints, bracing, and where site-built trusses stop being safe.
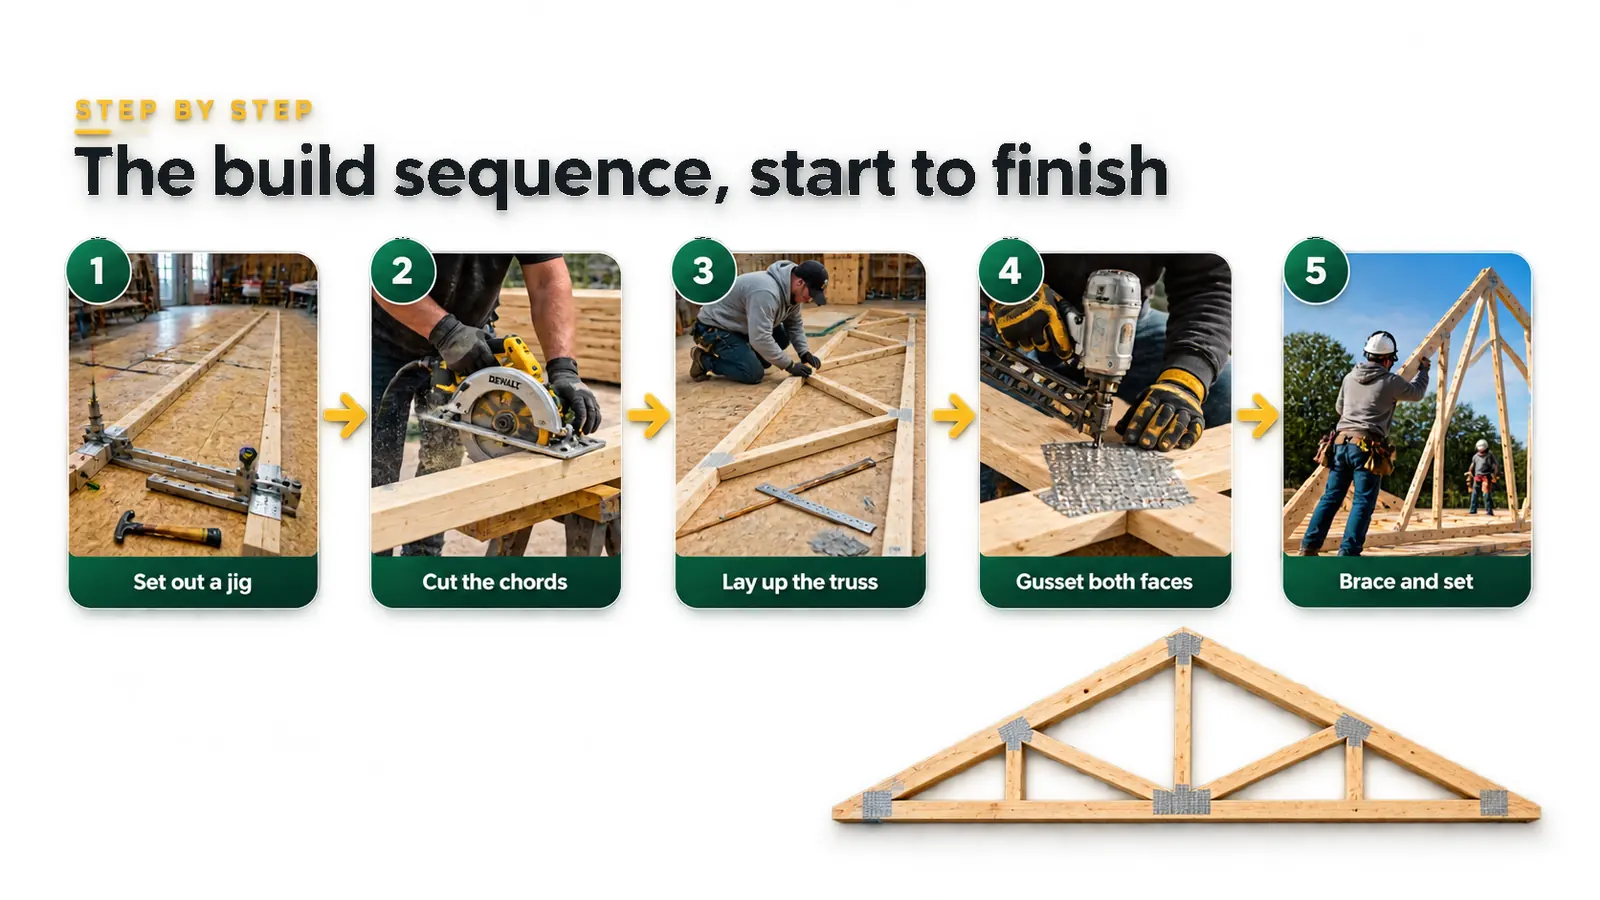
How to build a roof truss comes down to five stages: set out a full-size jig, cut the chords and webs to the lengths and angles your design calls for, lay them into the jig, fix gussets to both faces of every joint, then brace the finished trusses properly as you set them. The sequence is short. Getting every truss identical is the part that takes care. Before cutting anything, run your span and pitch through the roof truss calculator so you are working from real chord lengths and cut angles rather than a sketch.
One thing to be plain about at the start. What follows is general build sequence knowledge for small, low-stakes structures such as sheds, garages and workshops. It is not a substitute for an engineered design where your jurisdiction requires one, and most jurisdictions require one for anything habitable or beyond modest spans. Check with your building department before you buy lumber.
Before you cut: get a design
Even a shed truss needs the right members in the right places. “It looked about right” is how roofs sag.
Work out and write down:
- Top chord length, heel to peak
- Overhang tail length
- Bottom chord length
- Web member positions and lengths
- The heel cut angle and the peak cut angle
- How many trusses the building needs
The shed roof truss design calculator produces all of these from a span, pitch and overhang, and draws the profile so you can check the shape matches what you pictured. Print the results. You will refer to them constantly.
Step 1: Build a jig
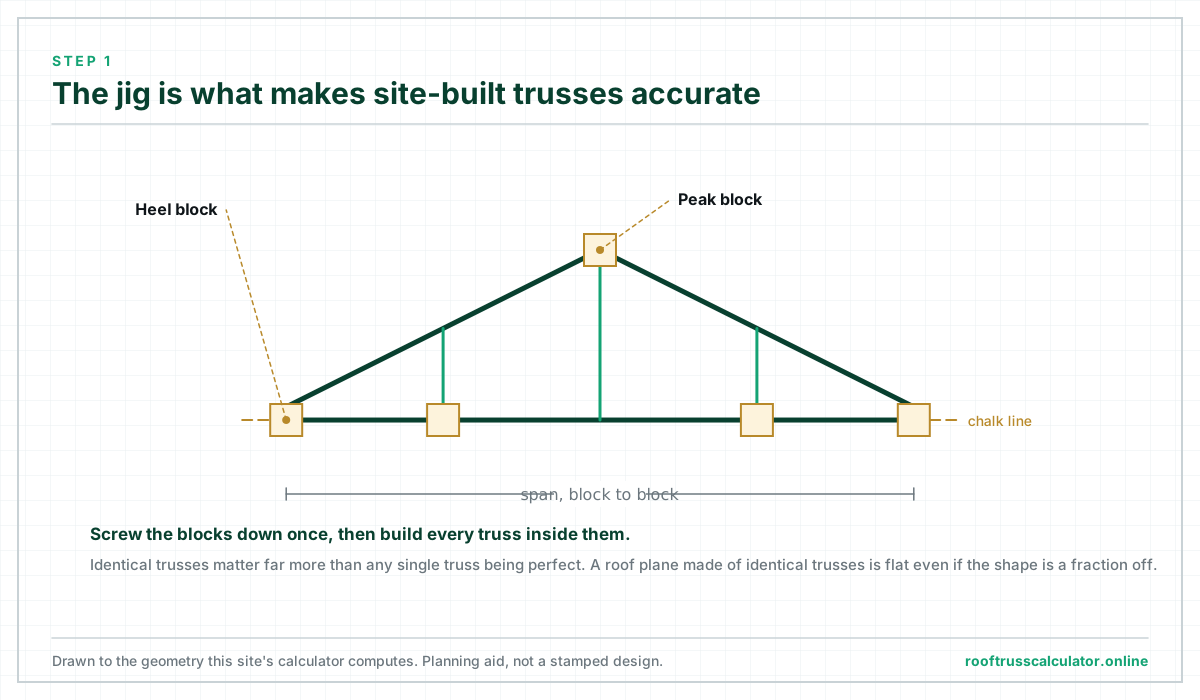
This is the single thing that separates good site-built trusses from bad ones. Individual accuracy matters far less than every truss being identical. If they all match, the roof plane comes out flat even when the shape is a fraction off.
Find a flat surface. A garage floor, a level driveway, or two sheets of plywood screwed to a level frame all work.
- Snap a chalk line for the bottom chord.
- Measure and mark the two bearing points at exactly your span.
- Mark the peak position: centre of the span, at the calculated height above the bottom chord line.
- Screw blocks of scrap 2x4 down outside each of those points, plus two or three along the bottom chord line.
Those blocks form a cradle. Every truss gets built inside it, so every truss comes out the same.
Step 2: Cut the chords
Set your mitre saw to the calculated angle. Most saws are calibrated from square, so for a 4:12 pitch you may set 18.4° at the heel and its complement at the peak. Cut an offcut first and check it against the drawing before working through a stack.
Crown every board before you cut it. Sight down the length, mark the high side of the curve, and put the crown up on every top chord. A truss built from lumber crowned in random directions will never sit flat.
Cut one of each member, dry-fit it in the jig, and confirm the fit. Then batch-cut: all the top chords, all the bottom chords, all the webs. Batching is faster and more consistent than building one complete truss at a time.
Step 3: Cut the gussets
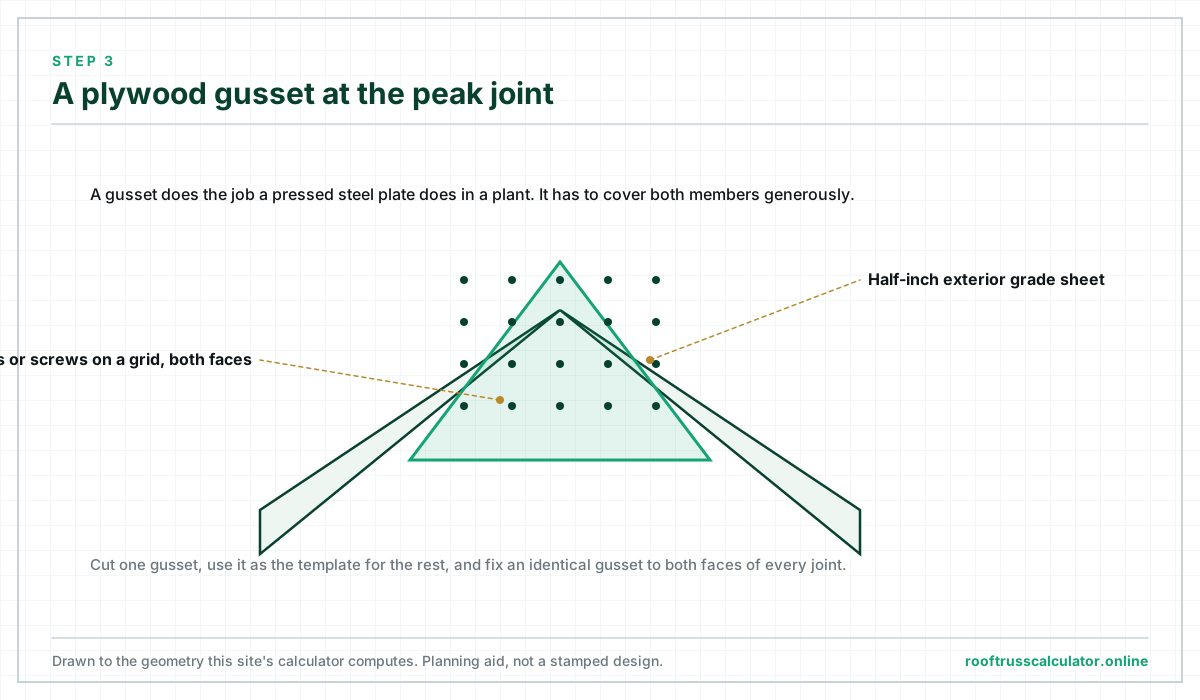
Site-built trusses use plywood or OSB gussets (opens in a new tab) where a factory truss uses pressed steel plates (opens in a new tab). For 2x4 chords, half-inch exterior grade sheet material is the usual choice.
| Joint | Typical gusset size | Why it is sized that way |
|---|---|---|
| Peak | About 12 in square | Two chords meeting at the highest force point |
| Heel | About 10 by 14 in | Carries the full bearing reaction into both chords |
| Web intersections | About 8 by 10 in | Shorter members, lower forces |
Those sizes reflect common practice for light shed and garage trusses. They are not a code allowance. One useful check regardless of size: every member entering a joint should get at least six nails through the gusset into it, properly spaced.
Cut every gusset from one template so they match. Mark a nailing grid on the first and use it to mark the rest.
Step 4: Assemble
- Lay the bottom chord into the jig against its blocks.
- Set both top chords, tight at the peak, seated at the heels.
- Drop the webs into position. They should touch both chords without being forced.
- Run construction adhesive onto the gusset face.
- Nail the gusset with 8d nails at roughly 3 in centres in a staggered grid, keeping every nail back from the gusset edge.
- Flip the truss and repeat on the other face.
Both faces, every joint. A single-sided gusset puts the joint into eccentric bending it was never meant to take, and it is worth a fraction of a proper two-sided joint.
Adhesive under the gusset roughly doubles joint stiffness and costs very little. Use it.
Step 5: Check the first one before you build twelve
Verify before you repeat:
- Span at the bearing points, within an eighth of an inch
- Peak height, within a quarter of an inch
- Both diagonals, heel to opposite top chord. They should match. If they do not, the truss is racked.
- A straightedge along the top chords, no dips or humps
- Stand it up. It should stand without twisting.
Fix anything wrong now and adjust the jig, rather than repeating the same error eleven more times.
Step 6: Leave the overhang tails long
Do not cut the tails during assembly. Leave the top chords running long, install the trusses, then snap one chalk line across all the tails and cut them in place.
You get a straight fascia line even if a truss or two ends up slightly out of position, which some always do.
Step 7: Store them properly
Trusses stored badly get damaged before they are ever installed.
- Stack them vertically on edge and brace them upright, or lay them flat on level ground with blocking under every bearing point.
- Never stack them flat with the middle unsupported. They take a permanent set.
- Cover them. Wet plywood gussets delaminate.
- Keep the stacks low.
Step 8: Set and brace
This is where most site-built truss projects go wrong, because a truss is enormously strong in its own plane and very weak out of it.
- Set the first truss at one end and brace it back to the ground or to stakes. It must be plumb and genuinely solid, because every other truss references off it.
- Set the next truss, fix it to the wall plate, then immediately run temporary diagonal bracing back to the first.
- Continue along the building, adding continuous lateral bracing along the top chords as you go.
- Add diagonal bracing in the plane of the top chords in a repeating pattern. This is what stops the whole roof racking like a row of dominoes.
- Leave every brace in place until the sheathing is on.
Fix each truss to the wall with hurricane ties rather than relying on toe-nails. Toe-nailing has very little uplift capacity, and a light roof is exactly the kind that lifts.
The Structural Building Components Association publishes detailed handling, installing, restraining and bracing guidance in its BCSI series, which is the reference the industry itself works from at this stage. It is worth reading before you set anything, and it is available through the SBCA (opens in a new tab).
Permanent bracing is not temporary bracing
A distinction that catches people out. Temporary bracing holds trusses up during construction. Permanent bracing is part of the finished structure and stays forever.
Roofs have failed years after they were built because permanent web bracing was never installed. The trusses were fine under normal load and found the unbraced compression web during a heavy snow year. Where a design specifies permanent bracing, install it. It is usually a couple of hundred dollars of lumber.
What goes wrong most often
Cumulative layout error. Mark every truss position from one end of the building, never truss to truss. Small errors compound, and by the far wall your sheathing no longer lands on a chord.
Gusset nails too close to the edge. They split the sheet and the joint loses most of its capacity. Keep them well back.
Building on an unlevel jig. Everything downstream inherits the error. Check the surface with a level before you start.
Guessing the load. Snow and roofing weight both change what the truss has to carry. Work the figure out properly with the roof truss load calculator, then confirm it against your local requirements rather than assuming a national average applies to your site.
When to stop and buy instead
Buy trusses rather than building them if any of these apply:
- Span beyond roughly 24 ft
- Anything habitable, or anything needing a permit with structural review
- A room in the roof, a girder truss, or any concentrated load
- Heavy snow country
- No flat surface large enough for a proper jig
Get a quote either way. It takes ten minutes and the number is often lower than people assume. Our guide to DIY versus professional roof truss installation works through where that line sits in practice, and when you need a stamped truss design covers the permitting side.
Frequently asked questions
Can I build my own roof trusses legally?
For small accessory structures many jurisdictions allow site-built trusses, sometimes without structural review. For habitable buildings, and generally past modest spans, an engineered design is required. Rules vary by location and there is no universal answer, so ask your building department before you start rather than after.
What size lumber do I need for a homemade truss?
Most short-span shed and garage trusses use 2x4 chords, stepping up to 2x6 as span, snow load or roofing weight increases. The right size depends on span, spacing, lumber grade and load together, so check the combination in the span calculator and confirm it against local requirements before ordering.
How thick should truss gussets be?
Half-inch exterior grade plywood or OSB is common for 2x4 shed trusses, fixed to both faces with adhesive and nails. Thicker sheet does not help much on its own. Gusset area, nail count and nail spacing all do more for joint capacity than thickness does.
How many trusses will my building need?
Divide the building length in inches by the spacing in inches, then add one for the truss at the far end. A 24 ft building at 24 in centres needs thirteen. The spacing calculator works this out and flags when your spacing exceeds what standard sheathing can span.
Is it cheaper to build trusses than buy them?
At small spans, usually yes on materials. A short shed truss costs noticeably less in lumber than a delivered equivalent. The saving shrinks as span grows, and once you count your own time and the value of a sealed design, buying wins for most projects above garage size.
Next step
Draw the truss before you cut it. Put your span, pitch and overhang into the roof truss calculator and you get chord lengths, both cut angles, the truss count and a scale drawing you can print and take to the saw.